Tonight I am revealing all for
Sarah's PingsAndNeedles Japanese Scrap Bag Challenge.
Back in the summer,
Sarah threw down the gauntlet to find out what her fans/followers would make with a scrap bag from
The Eternal Maker.
With a 2-tier prize, first the battle to be one of 10 finalists to win a scrap bag, and then for part two, to turn our suggestions into reality.
Shortly you good folks of blogdom and flickrland will be asked to vote for a winner of a years' subscription to the Eternal Maker's Japanese Swatch club. How totally cool is that!!?
So here goes... my attempt for the big one!
My idea was
"depending on the scraps, I would be making tags to distinguish all 3 school kiddies identical book bags, PE bags, swimming bags and cardies; children should be identifiable by pattern!"
 |
| An easy way to distinguish between this lot at a glance has got to be a good thing! |
I think I could let the photos do the talking; I have smudged the sew-in name tags to protect the daft and clueless, but I hope this will not detract from your enjoyment...
 |
| My scraps, straight out of the bag, approximately a FQs in total... |
 |
| Initial pairing up for fronts and backs... |
 |
| The first 'batch' that have been in daily use since the beginning of September... |
 |
| Fronts - with name tags sewn on, attached to the zips of the girls' rain coats... |
 |
| The backs... |
 |
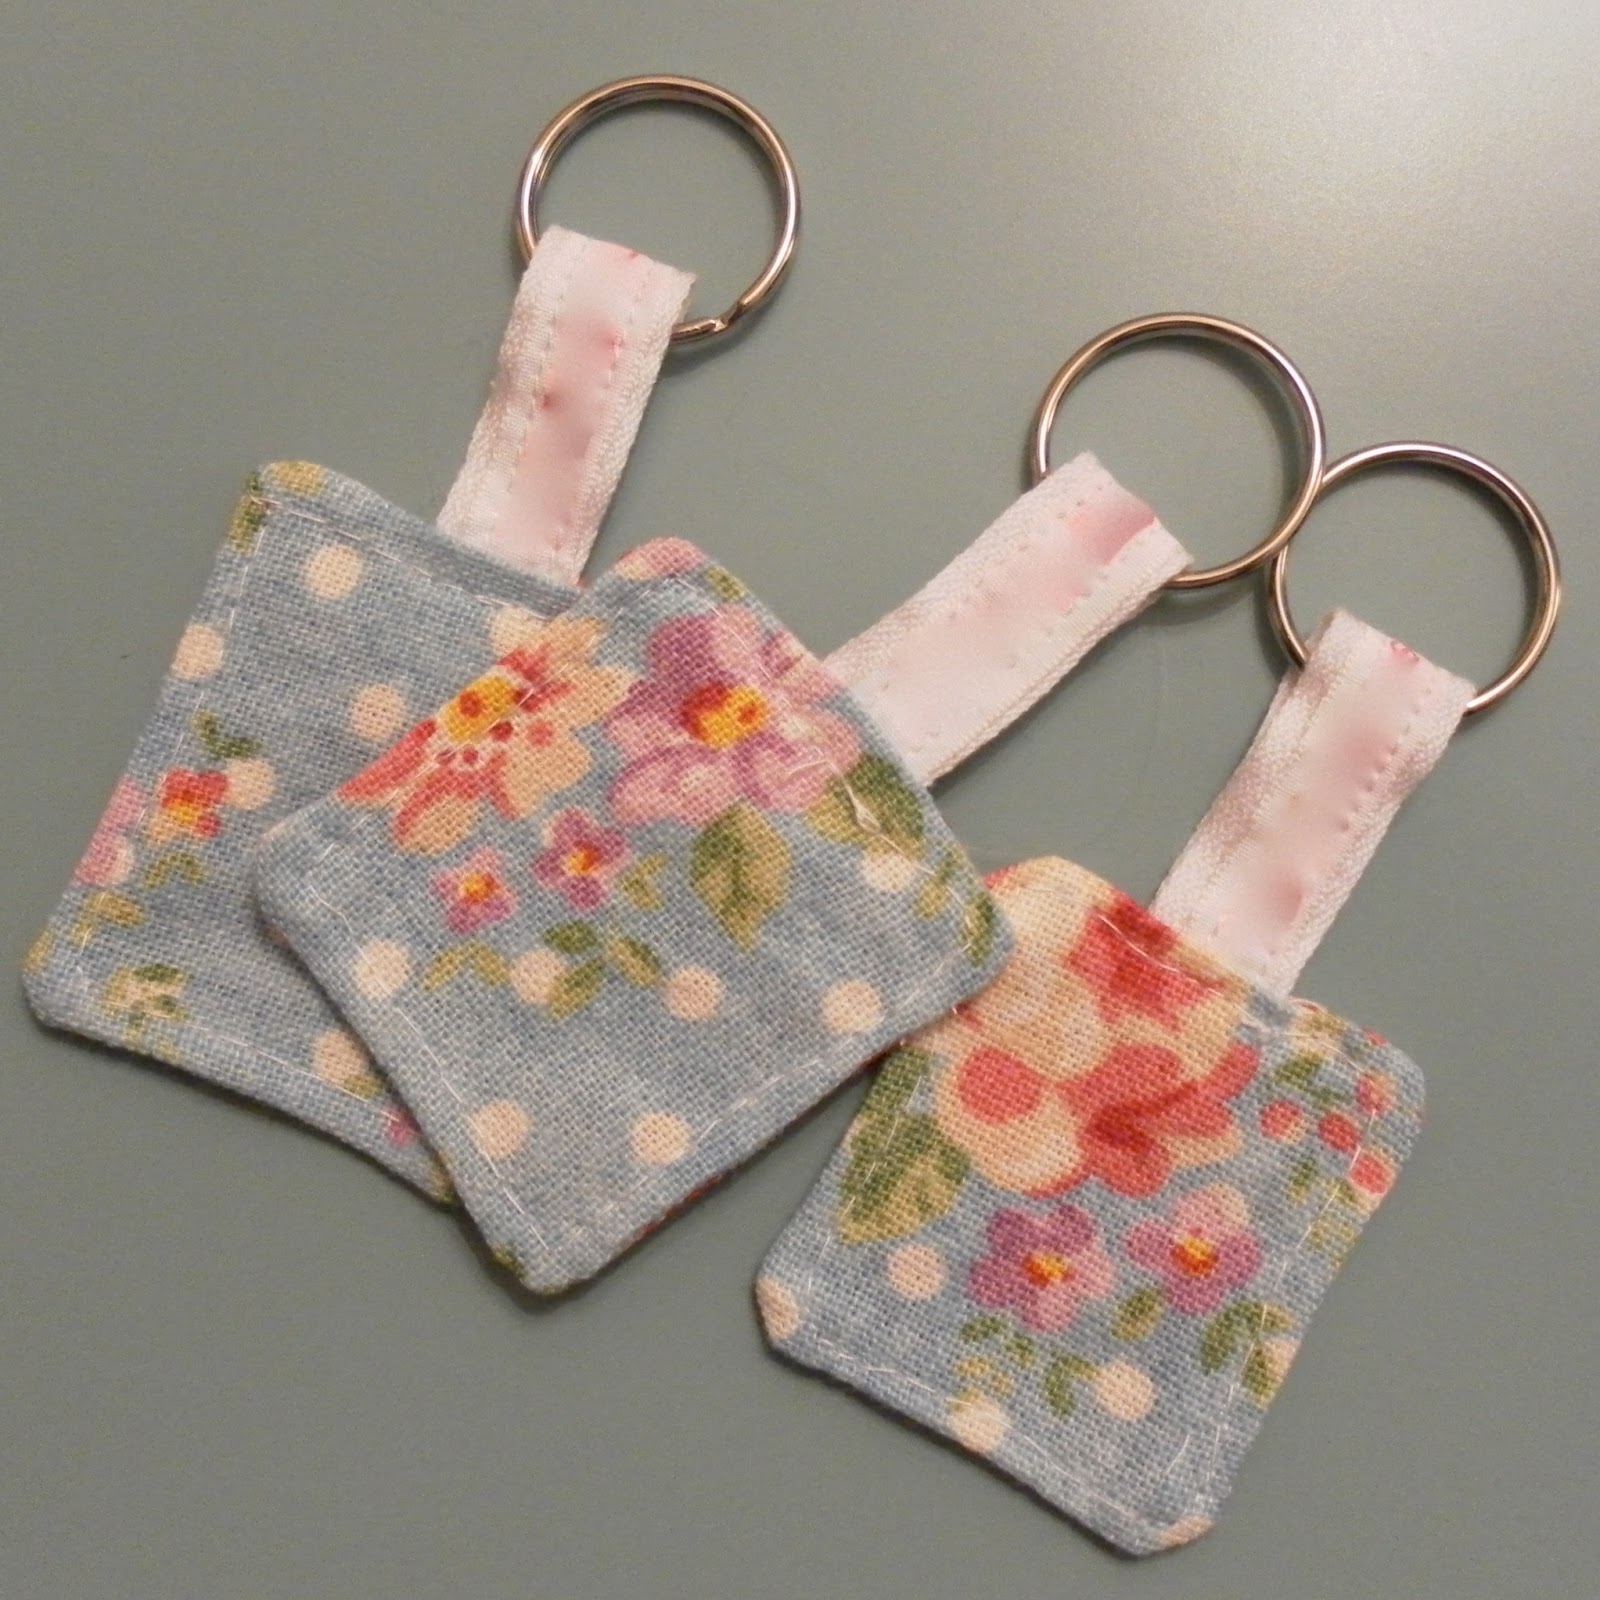
| Bag tag fronts for twin 1... used on lunch bag, book bag and PE kit... |
 |
| Twin 1's bag tag backs... |
 |
| Twin 2, the ballerina, fronts... |
 |
| Twin 2 backs... |
 |
| More for the girls... arguments ensued! |
 |
| Back of the above... |
 | | | | | |
|
|
|
| One for mummy - it's Echino, definitely not suitable for children! |
 |
| Mummy's backside! |
 |
| Not to let dear son miss out! |
 |
| Back of the above... |
 |
| The second 'batch' all together. |
The 'design', in the broadest sense of the word, kind of evolved with each tag I made, until I had it perfected, (well I got it all to work without the need for swearing!)... so if you whizz through the pics below, the making will all be pretty clear, remembering that sizes are determined by the scraps you have...
 |
| Select your scraps... |
 |
| Double fold a small piece which will become the loop... |
 |
| Trim the smallest piece to the largest possible size... |
 |
| Trim the larger piece to match the first... |
 |
| Ready for sewing... |
 |
| Run two rows of topstitch to encase the raw edges... |
 |
| Stick a pin in it! Remove the pin once the folded loop is held in place with your presser foot... |
 |
| Stitch down 'within' the seam allowance (which can be whatever you want it to be!)... |
 |
| Place right sides together and pin either side of the loop to keep it all straight.. |
 |
| Start at the bottom end, leaving a gap for turning, spin the tag round when you get to the end and go back and stitch to the beginning... |
 |
| Trim your corners, and turn through, using the tag to pull makes it a lot easier... |
 |
| Use one of those bits that come with your sewing machine to push out the corners... |
 |
| Cut a piece of thin wadding smaller than the inner dimensions of the tag, push it inside with the same gadget... |
 |
| Topstitch all round and ensure the open end is sewn closed, and sew in the loose ends... |
 |
| Finishing tip... Use an easy-thread needle to reverse the threads through to behind the button, catch the thread with a pin and pull through the button - then you can wrap the thread around the button post (I remember that from school!), and bury the threads inside the tag... tidy! |
 |
| Ta da! |
And here we have a tag all ready to use and clip onto whatever takes your fancy...
Perhaps you will feel inclined to give me your vote, maybe not - you could even use up some of your scraps to make something way better without the 'competition angst'.
Either way, I hope you have enjoyed my disjointed process and make sure you take the opportunity to check out
the rest of the competitors.


HaHaHa! Love your 'backside'!!!
ReplyDeleteAlso love your little mini makes from scraps and that you used their name tag strips for the loops. Brilliant!
Well done you, these are fab, and simple enough for us all to make our own! Love the robot, he's my favourite :)
ReplyDeleteCool! You have a lovely backside ;-)
ReplyDeletequite a nice backside you have there although, i do love your sons shades too! super cool!
ReplyDeletevery nice :-) shall I just stop now eh? :-P especially love the wee mans tags!
ReplyDeleteLove, love love those tags! What a great way to help identify the kids bags, and such a simple yet effective way to do it too! Great job! The buttons add a lovely sweet touch too.
ReplyDeleteJules
Mummy's backside looks great - so much better than the carbuncle you shared a couple of weeks ago! Love these tags and your tutorial is brilliant - good luck!
ReplyDeleteDitto to the 'backside' comments!!! Great tags too! Best of luck with the contest!
ReplyDeleteYour backside looks fab ( but we knew that already!) These are gorgeous, where do I vote?
ReplyDeleteThese are genius Hadley - I love them and you definitely get my vote!
ReplyDeleteBrilliant idea. Our twins do have favourite colours, one pink and one blue but often want to have things that are the same so tags like these would be very helpful.
ReplyDeleteYou kill me 'echino, not suited for children' SO TRUE!!! And Mommy's backside. Priceless. I love your tags - what a fabulous idea.
ReplyDeleteOoh, all such different things people have made, but I think you have the prettiest backside ;o)
ReplyDeleteAbsolute bloomin' magic!
ReplyDeleteAs usual truly magnificent!
ReplyDeleteYour tags came out super cute! I really like the robot one. :)
ReplyDeletesuper cute! I'm pinning this tutorial for future use. Awesome.
ReplyDeleteWhat a great way to use those scraps..... Who'd of thought you could make so much from that little bag. Oh and echino is definitely just for mummy's!!!
ReplyDeleteSo many bags to keep straight! The tags are a fabulous idea!
ReplyDeleteGreat idea, these would make super little gifts too!
ReplyDeleteThay're fantastic Hadley! Well done :)
ReplyDeleteYour butt looks great! Are we twins?! Great job want to make these for son#1. Love the dress though seriously! U get my vote !
ReplyDeleteAnd there you go showing your backside again.
ReplyDeleteThese look great, Hadley! The little tute will absolutely be used! Thanks for taking the time to write it up for us :)
These are Just Fantastic Hadders!
ReplyDeleteIf I could vote for you I would ... I'll have the voting post up sometime over next couple of days ... just waiting for some finishers ....
... pert backside too ...xxx